


At what point is lake ice safe? Check and measure it before moving on thin ice! Ice safety is really important. Minimize the risk and check if it is safe ice.
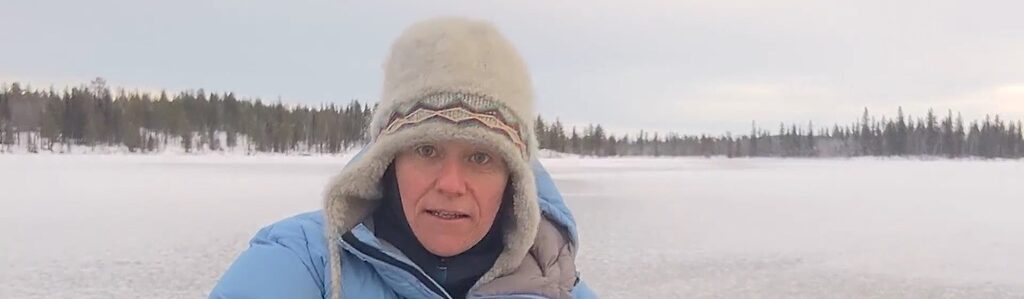
Thin ice on frozen lakes is a big danger. In this post I explain how I reduce risks when moving on lake ice.
I arrived back home from my CDT hike in late October. A winter wonderland welcomed me. White happiness was already abundant. What a welcome to my home in the middle of nature!
However, the lake ice thickness was almost zero. Only gossamer thin ice covered the water around my peninsula. And the overlying inches of snow ensured that this thin ice was also already insulated and the lake ice was slowed in growth.
A bad situation for me and my sled dogs. The forest roads over which we normally sped in the fall were covered with plenty of snow. And the road there plowed and icy. Patience was the order of the day and training had to wait.
According to my friends and neighbours, a long lasting rain period in autumn additionally made sure that the swamps partly became lakes. A bad starting position for safe ice.
Fortunately, another warm spell turned the swamps and the snow on the thin lake ice back into water. So there was another chance for safe ice. But for this it needed deep minus temperatures before the coming snowfall.
But we got the desired cold only partially. The ice formed very slowly. But at least it was possible to make a short dog training track on the now frozen marshes.
Every morning my first look was at the thermometer. Using the rule of thumb of 0.1 mm per minus degree per hour, I tracked lake ice in my mind. And after a night of great minus 20 degrees Celsius, I gathered my measuring tools and sped to my lake crossing on Kuukasjärvi.
With a special ice pick I cut through the ice cover not far from the shore. The lake ice was not of good quality (more about this below). At the top there was thin ice and underneath I encountered 2-3 cm of water in front of the actual ice layer.
But the 12 cm lake ice underneath gave me hope. Carefully I worked my way forward. The ice pick in one hand and the measuring stick in the other I marched slowly towards the center of the lake.
With every 2nd step I hit the ice pick hard on the ice. If it withstood this, I knew that the layer was supporting me. At the weakest point of the crossing I measured an ice thickness of 8-10 cm. Just enough for a human. However, not really for me with my dog team.
I had an idea. The 2-3 cm of water on the lake ice was now very welcome. My heart beat higher and higher as I sat down on the snowmobile. Once again I checked my little hand “ice pick” around my neck. The rescuers in the emergency. Should I fall through the lake ice I would be able to work my way more easily onto the ice cover.
Then I gathered up all my courage and roared along my measuring holes. The water splashed left and right of it as expected. I broke through thin ice and exposed 2-3 cm of water on the actual lake ice.
Reaching the other shore, my heartbeat sank lower again. All was well. I was on safe ice. I roared back and forth a few more times to make the track as wide as possible.
Now the “brought up” water would make the lake ice grow an additional 3 cm in the coming night! And with that, I was one big step closer to my real dog training! Happy and satisfied, I gathered all my utensils, stowed them in my snowmobile and headed home. A warming coffee in my Tiny House completed my happiness.
Icy background information
How lake ice grows
Ice is water in a solid state. Water is heaviest at four degrees above zero. In the fall, the surface water cools and sinks, the water stratifies, and the heat from the water is carried into the air. Only then can lake ice begin to settle. Ice growth depends on wind, weather and temperature.
Since many parameters play a role, it is difficult to predict exactly how fast the thin ice will grow. The rule of thumb is one tenth of a millimeter of growth per hour of subzero temperatures. Ten degrees below zero for ten hours results in one centimeter of ice. Under ideal conditions, however, lake ice grows much faster.
The different lake ice qualities
Spring ice and ice with snow require a greater thickness to support. A layer of ice on a lake is not uniform in thickness. Different depths, currents, temperature differences, and weather patterns create different conditions for ice formation.
Movement in the water is the most common cause of weak and dangerous thin ice. These are found in straits, at headlands, over shoals, and where water flows into or out of the lake.
Bridges and jetties also usually form weak lake ice at the time of freezing. And wind wells are dangerous points that are held open by the wind and freeze later than the surrounding water.
Cracks quickly become wide crevasses in the spring due to sunlight. They are usually in the same places every year. I found a very interesting article about the fact that melting ice influences the world’s climate. Please have a look here if you want to know more about this.
Assessing lake ice thickness requires both experience and knowledge.
Black ice
In cold temperatures without snow, the so-called black ice is formed. The water freezes directly and quickly into ice, without snow mixture. It is transparent and often shiny and black. It grows downward, forming columnar crystals, and is generally the most stable type of lake ice.
Solid ice
The next stage is the opaque, grayish solid ice. It consists of snow ice that forms when wet snow freezes on its upper surface. On top of this usually lies a more or less thick layer of snow.
The Swedish Stöpis (unfortunately do not know the translation).
When snow falls and ice settles on the lake, the weight of the snow pushes the ice down. When enough snow has fallen in relation to the thickness of the lake ice, water seeps onto the ice through small cracks. Like a sponge, more water is then sucked into the snow.
As the lower snow becomes wet, the ice is further weighted down, and the wet snow slush that forms on the lake ice at zero degrees prevents further growth on the underside of the ice.
Instead, the slush/snow begins to freeze and grow, provided cold conditions prevail. So there are two layers of ice with water in between. Only when the water in between freezes can the lake ice thickness continue to grow.
Swedish Stampis
Strong winds and waves can push ice against land or firmer ice. This can form a so-called wall that can reach several meters in depth.
Pack ice
Similarly, ice up to 20 centimeters thick can form so-called pack ice dams. Pack ice dams are formed when ice is pressed against land or firmer ice and stacked on top of each other, and can grow several meters high.
I found a very interesting article about lake ice and global warming.
Load capacity
The load capacity increases with the square of the thickness, i.e. if 3 cm carry 90 kg, 4 cm carry 160 kg and 5 cm 250 kg. Of course, the carrying capacity of the ice decreases accordingly. Weight distribution and speed on the ice also play a role.
Of course, the corresponding number of centimeters always refers to solid black ice. I have explained its meaning above. And solid ice means that the lake ice must have this minimum number of inches at the thinnest point.
A pedestrian or skater can move on lake ice as thin as four centimeters without breaking through the ice. However, the ice is not always smooth and has cracks, so 5-6 cm thickness is necessary for safety. And as mentioned above, this should be solid ice, or solid cm.
The more people moving on the lake ice at the same time, the faster the load bearing capacity decreases. So if you go out with a group it is of utmost importance to keep distances between each person.
For snowmobiles or quads an ice thickness of at least 12-20 cm is appropriate. Depending on the weight of the machines. For cars, at least 20 cm of ice is needed.
Safety measures on the lake ice
- Never be alone
- Always carry ice picks and other safety equipment (spare clothes, test stick, rescue rope etc.)
- Always test the ice with an ice stud if you are unsure.
- Never go on ice if you are unsure if it will hold
- Note that new ice, spring ice, and snow covered ice can be weak.
- Learn where the weak spots are: reeds, rocks, jetties, bridges, outlets, bays, shallows, and wind tunnels.
- Never leave children alone on or near lake ice
- Always announce where you are going and when you plan to return.
What do you do if you fall through the lake ice?
The first thing you do is turn in the direction you came from. Then you know that the ice still carried you there. Then you use your ice picks, which you preferably carry high up around your neck so that you can easily reach them. With the help of these ice picks you pull yourself onto the lake ice.
At the same time, use your legs to help you float. Once you are on the ice, you do not get up immediately, otherwise you run the risk of collapsing again. You roll away from the hole or continue chopping with the ice axes while lying down. Until you reach safe ice. But never forget. Lake ice is NEVER 100% SAFE!
More posts about my life with adventures and sled dogs you can find here.
Are you interested in my life in the wilderness of Lapland and my upcoming winter adventures? Feel free to subscribe to my newsletter and join me! Welcome to my journey!


Leave A Comment